HOWTO: HOWTO: Operat Qt LineEdit Widget as Windows Control in Windows 7
Compared with Win7 and Win10, the types of controls supported by the system Accessibility are less. For example, the DataItem control type that needs to be recognized this time cannot be recognized in Win7, and it will be recognized as the Custom control type, that is, it will be treated as a custom control. This makes it indistinguishable from Custom controls used to represent rows of data. Therefore, for the Win7 system, the method described in the previous article HOWTO: Operat Qt Table Widget as Windows Control to obtain the data row first and then obtain the target cell according to the number of columns where the data is no longer applicable. Another method introduced in this article can automate Qt's Table control under Win7.
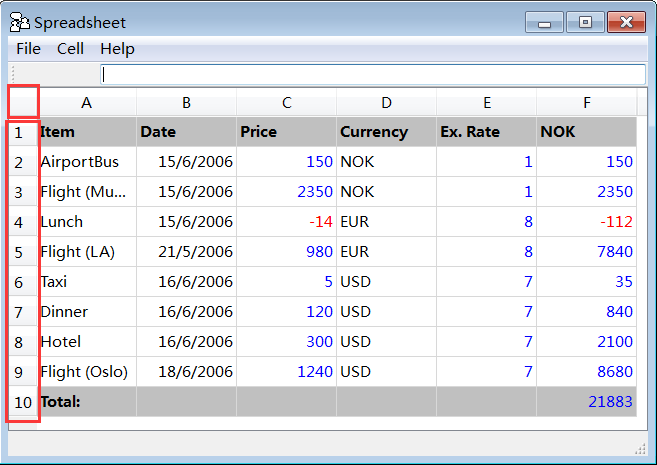
The SpreadSheet Demo provided by Qt is still used here. Due to space limitations, only the application in Qt 4.x version is introduced here, but this does not mean that automation cannot be performed in Qt 5.x. In fact, since the principle of the method used in this article is consistent with HOWTO: Operat Qt Table Widget as Windows Control, the requirements for the table structure are not strict, so there is no need to strictly distinguish the version of Qt.
Ways to handle cell type confusion
As mentioned above, in the Win7 system, the cell control in Table will be recognized as Custom, which is the same as the recognition type that originally represented the data row container. The specific recognition of the object node tree is as follows:
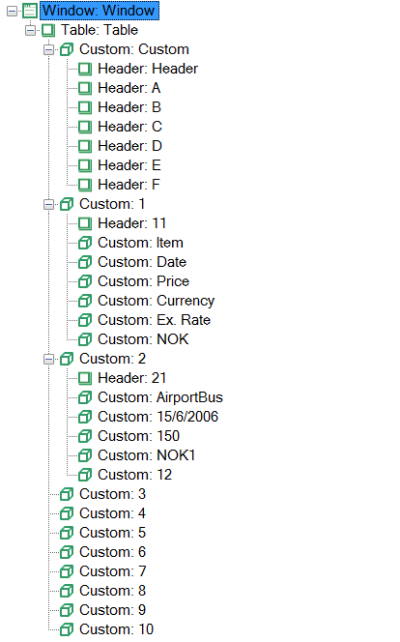
It can be seen that the DataItem control type is completely invisible, because this control type is not yet supported on the Accessibility of Win7. The solution provided here is to obtain the content of the specified Custom control by converting the row and column coordinate information of the target cell into the index information of the array.
Potentially useful method: Get all Custom controls
Since the cell and the data row control are identified as the same type, and the other attributes identified by the two are insufficient, there is no suitable condition for filtering, so outputting all Custom here will additionally output the information in the red box:

code show as below:
(async function() {
    let cells = await model.getTable("Table").findControls({ type: "Custom"});
    cells.map(async (cell,index) =>  {
        console.log('index-' + index + ':', await cell.name());
    })
})()
The output is:
index-0:
index-1: 1
index-2: Item
index-3: Date
index-4: Price
index-5: Currency
index-6: Ex. Rate
index-7: NOK
index-8: 2
index-9: AirportBus
index-10: 15/6/2006
index-11: 150
index-12: NOK
index-13: 1
index-14: 150
index-15: 3
index-16: Flight (Munich)
index-17: 15/6/2006
index-18: 2350
index-19: NOK
index-20: 1
index-21: 2350
index-22: 4
index-23: Lunch
index-24: 15/6/2006
index-25: -14
index-26: EUR
index-27: 8
index-28: -112
index-29: 5
index-30: Flight (LA)
index-31: 21/5/2006
index-32: 980
index-33: EUR
index-34: 8
index-35: 7840
index-36: 6
index-37: Taxi
index-38: 16/6/2006
index-39: 5
index-40: USD
index-41: 7
index-42: 35
index-43: 7
index-44: Dinner
index-45: 16/6/2006
index-46: 120
index-47: USD
index-48: 7
index-49: 840
index-50: 8
index-51: Hotel
index-52: 16/6/2006
index-53: 300
index-54: USD
index-55: 7
index-56: 2100
index-57: 9
index-58: Flight (Oslo)
index-59: 18/6/2006
index-60: 1240
index-61: USD
index-62: 7
index-63: 8680
index-64: 10
index-65: Total:
index-66:
index-67:
index-68:
index-69:
index-70: 21883
You can see that the empty cells in the Table and the contents in the red box are also output together. Looking back, there are a total of 10 rows and 6 columns of data in the Table, and a total of 71 items have just been output.
We then introduce how to construct a function to locate a cell through an array.
Compatible method: construct coordinate transformation function
First, we create a function that receives the row and column coordinate information and returns the index value of the row and column coordinates in the array composed of all Custom in Table.
From the logic of converting Table (two-dimensional array) to one-dimensional array, we can understand that as long as we know the width (maximum number of columns) of Table, we can convert, so we can write the following conversion function:
// coordinate conversion function
function locate(row, column) {
    const width = 7;
    let index = (row - 1) * width + column + 1; // Convert to index value based on row and column values
    return index;
}
Then, since we only need to get the target cell, there is no need to use the findControls method to get all the cell arrays. The following code uses the getCustom method and the index parameter to get the desired cell:
(async function () {
    let row = 6;
    let column = 1;
    let cell = await model.getTable("Table").getCustom({ index: locate(row, column) });
    console.log(`row: ${row}, column: ${column} cell's value:`, await cell.name());
})()
The output is:
row: 6, column: 1 cell's value: Taxi
Next, we apply the method to the scene to verify whether the obtained value is correct.
Actual combat: use the above scheme in the steps
Since we need to verify a few more cells to prove that the solution works, the scenario outline is very suitable for the current situation. The steps are described as follows:
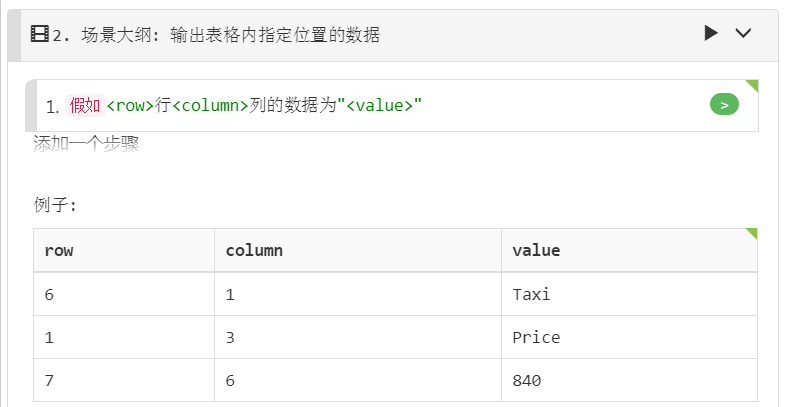
The steps are defined as follows:
Given("{int}行{int}列的数据为{string}", async function (row, column, value) {
    let cell = await model.getTable("Table").getCustom({ index: locate(row, column) });
    assert.equal(await cell.name(), value);
});
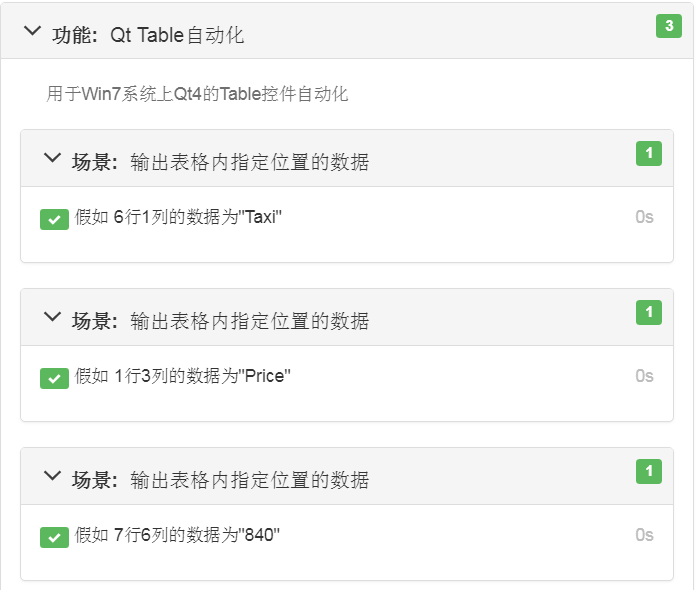
The report of the run output is as follows:
