Model Manager Interface
The Model Manager is a powerful tool for managing control objects in desktop applications.
It displays and stores test objects in a hierarchical tree structure, allowing users to easily spy, debug, and edit these objects, as well as generate invocation scripts or capture control snapshots.
The Model Manager supports multiple control types, including Windows controls, Qt controls, ATK controls, Java controls, image-based controls, and virtual controls.
With the Model Manager, you can reorder controls in the tree, edit object identification properties, and use various detection methods to retrieve control information.
For detailed instructions on detecting controls, see Spying Controls and Adding Objects.
Interface Overview
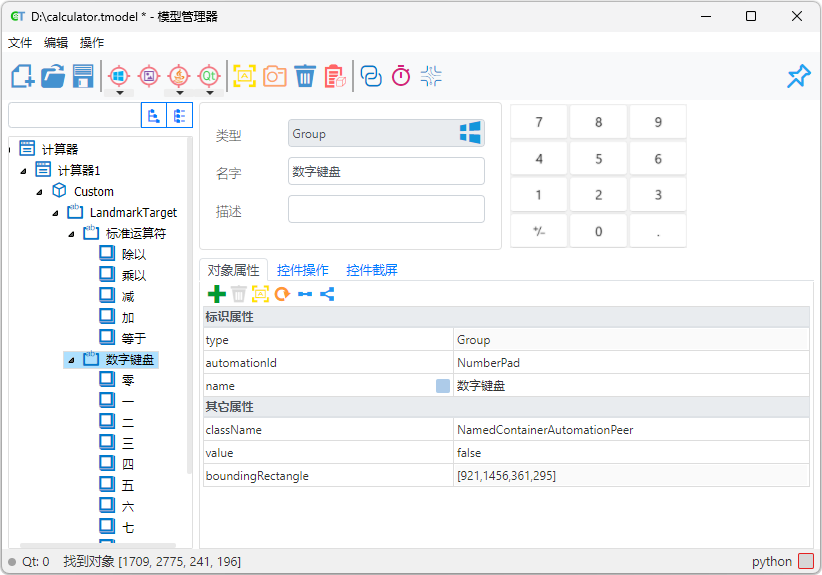
The following image shows the layout of the Model Manager interface:
Toolbar Functions
The toolbar provides a set of commonly used actions:
- File Operations: Create
 , open
  , or save
  the current model file.
 - Add Object: Enter spy mode to select a control or region and generate the corresponding object. For detailed steps, see Spying Control Objects.
- Object Actions: Quickly perform highlight
 , snapshot
  , or delete
  on selected objects.
 - Remote Connection: The remote connection feature
 enables operations on controls located on a remote desktop. For details, see Remote Mode.
 - Delay Mode: Configure delayed execution, useful for control detection, highlighting, and debugging. See Delayed Spy for more details.
- Spy Rules: Manage policies for saving objects during detection and recording. For more information, refer to Spying Rules.
- Always on Top: When enabled
 , the Model Manager window will remain on top of all other windows.
Quick Object Search Using the Search Bar
The search bar at the top-left of the Model Manager interface allows users to quickly locate control objects within the model.
After entering a keyword, the search function matches against object names, types, or property values and displays all matching results.
Users can expand or collapse the object tree to locate the desired object efficiently.
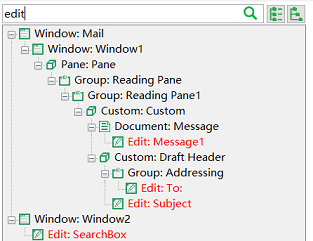
Example: Entering “font” highlights all matching objects in red within the object tree:
Object Model Tree
The Object Model Tree, located on the left side of the Model Manager interface, displays the hierarchical relationships of controls.
Similar to a web page’s DOM tree, it reflects the nesting structure of controls and plays a key role in control identification and matching.
Each object occupies a specific position in the tree based on its properties.
For more information about managing objects, refer to Managing Model Objects.
Object Detail Panel
Clicking any node in the object tree displays detailed information about that object on the right side.
The detail panel includes three main tabs that help you manage control properties, operations, and snapshots:
- Object Attributes: Displays and edits identification properties used to uniquely recognize a control. See [Identification Attributes] for more details.
- Control Operations: Lists all available actions that can be performed on the object and allows you to generate corresponding invocation scripts. See [Operation Methods and Invocation] for more information.
- Control Snapshots: Manages control snapshots and supports adding image-based or virtual controls within them.
When using Chained Objects, controls from different technologies can coexist within a single object tree.
Status Bar
The Status Bar, located at the bottom of the Model Manager, displays feedback information for current operations:
- Control Operation Status: Shows control position, size, and other details; if an operation fails, it displays the failure reason.
- Application Monitoring Status: Lists information about currently monitored applications.
If the application was launched using Qt Automation Recognition, this information will appear here. - Code Language: Displays the programming language used for code generation in the Model Manager, which defaults to the project’s language setting.
- Cancel Highlight: Located on the far right of the status bar, this option cancels the highlight frame currently displayed in the application.