Feature Examples
Concepts
Example is a concept in Scenario Outline. For each row of data in an Example, the steps of Scenario Outline will be executed and the corresponding data will be filled in the parameter.
You can have zero or more Example tables in the Scenario Outline. If no Example table appears in the Scenario Outline, this Scenario Outline won’t even be executed during the execution.

Typically one Example table is sufficient for one certain Scenario Outline. However, there are cases when you want to categorize Example rows into different groups, and using tags to run only some of groups for a test run. For more information on how to use Tags to in the Gherkin Document, please refer to Tags.
Usage
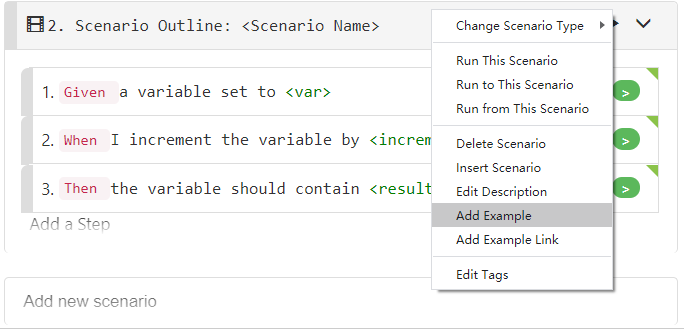
Right-click the title of the Scenario Outline to insert the example table as follows:

Double-click the header cell or data cell of the table, you can change the row to edit state. When switch the focus to the next cell with the keyboard (e.g.
Enter Key), the change to the previous cell will take effect.
Keyboard Navigation
When Example table is in edit mode, you can navigate among cells using keyboard. To move to the next table cells, you can press Enter or Tab. To move to the previous table cell, you can press Shift-Enter or Shift-Tab.
Linked example table
The example table is part of the feature file. Changing data means editing the feature file. As an alternative, you can choose to use the standalone example table file. It means you can put the external data file link in the feature file, and when run the scenario outline, it will use the data in the file to drive the scenario. To add the linked table, right-click the scenario outline and select Add Example Link, or click the link symbol ![]() in the upper right corner of the example table to select the data file to be linked. The data file should be in
in the upper right corner of the example table to select the data file to be linked. The data file should be in .csv files format.
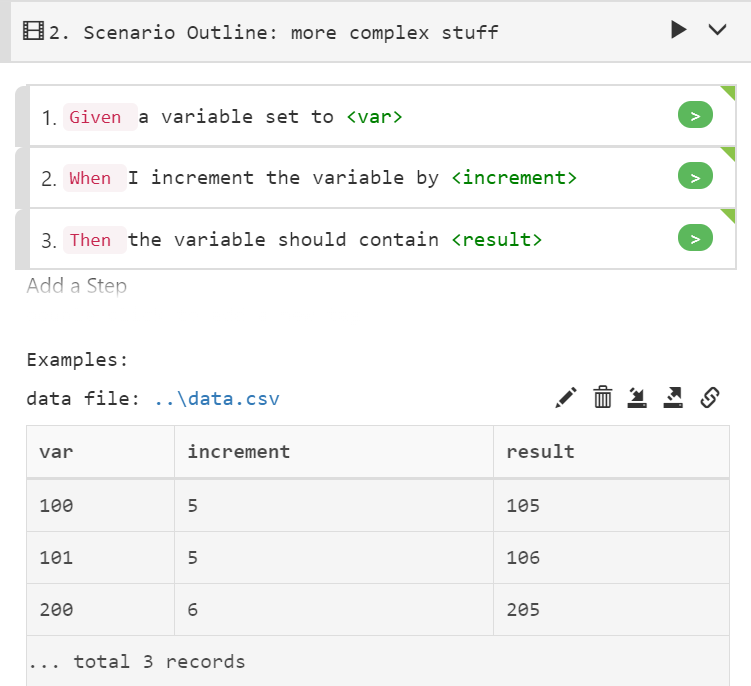
When the link example table is added, it rendering as follows:

The corresponding feature text is:
  Scenario Outline: Perform a lot of calculations (via linking table files)
    When clicking on the symbol "<sign1>"
    Then you click the number "<num2>"
    Then click the symbol "<sign2>"
    Example:
      #data_source: ..\data.csv
You can notice that the line for linking example starts with a commented data_source statement, then colon, and then followed by the file path. The file path can be either absolute path, or relative path to the feature file.
Note: The file path separator you use should be compatible with your platform. For example, if you use "/" as a path separator, it can work on all platforms, but if you use a backslash "\", such as "..\data.csv", it will only work on Windows platforms.
The rendered table is only for previewing the contents of the data table, the data file should be edited separately. If the external table file is modified and saved, you can right-click the linked example table and select Refresh to refresh the table previewing area.