Walkthrough:Create Test Automation Script for Qt Apps
Testing Qt desktop applications often involves manual testing by test engineers following test cases. However, for large applications, manual testing is time-consuming and lacks reliability and coverage. With the concepts of Continuous Integration/Continuous Delivery/Continuous Deployment (CI/CD) becoming more widespread, Qt testing is gradually shifting towards automation. To reduce the cost of developing automated tests, we provide the ability to record Qt applications to generate automation scripts.
In this exercise, we will use the Qt recording feature provided by CukeTest to quickly create a Qt automated testing project.
Recording and Generating Qt Scripts
1. Project Creation
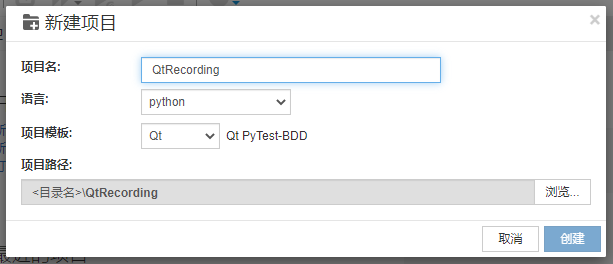
Open the CukeTest client, create a project, and fill in the project name. Note that the project template chosen is the Qt template under the Python language. After creating the project, the project homepage will automatically open.
2. Start Recording Script
Click on the recording settings in the main interface and fill in the path of the application to be tested (or leave it blank and manually start recording). Then, you can start recording.
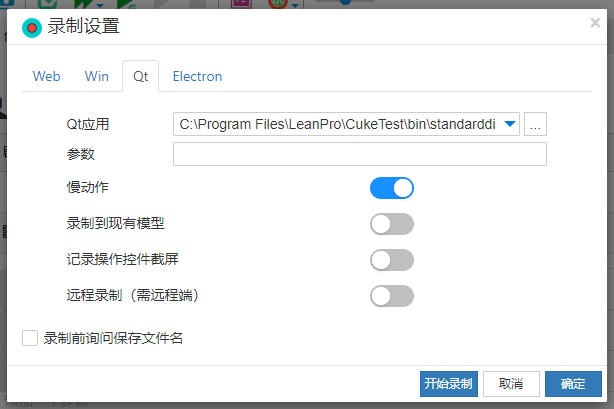
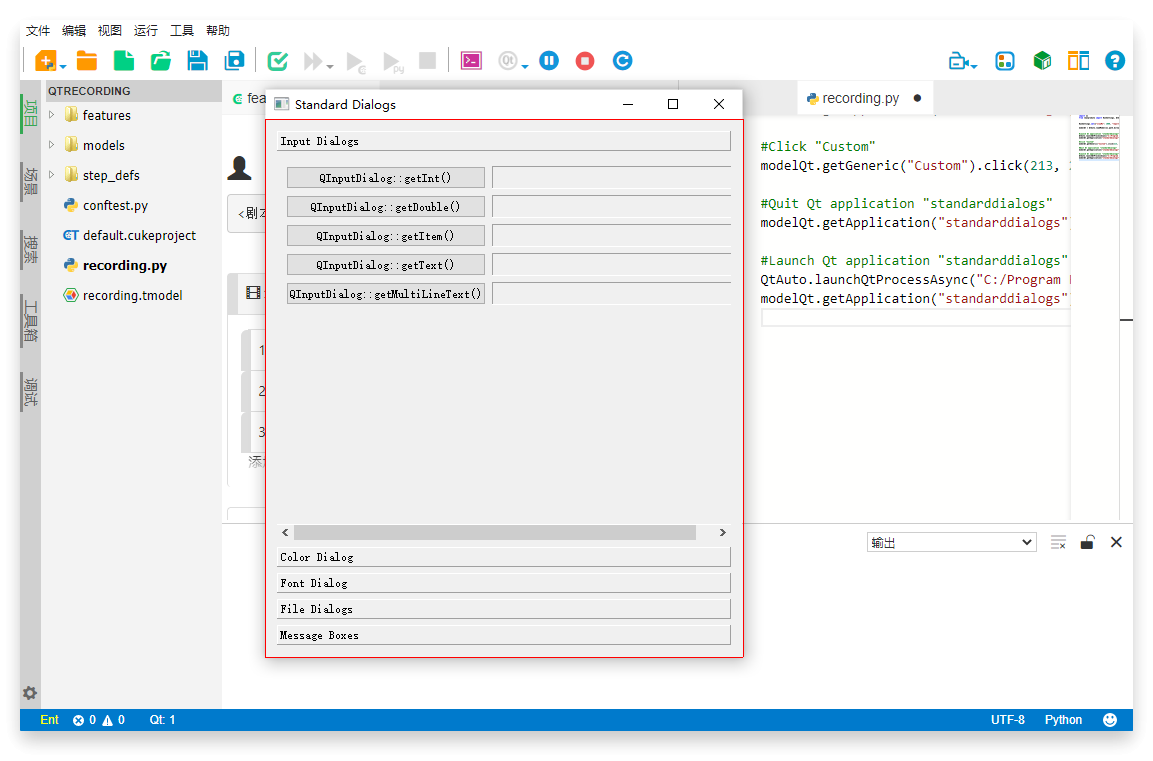
Here, we will use the sample application standarddialogs.exe provided by CukeTest to record a scenario of operating a text dialog:
- Open the text dialog.
- Modify the content of the text box.
The recording interface looks like this:
Adding Checkpoints
In automated testing, a checkpoint is a crucial part of verifying whether the application's state meets the expected conditions. In CukeTest, you can quickly add checkpoints during recording. Here are the specific steps:
Quickly Open the Checkpoint Dialog: While recording, hold the Alt key and right-click on the target control to quickly open the checkpoint dialog. This feature allows you to add verification steps instantly while performing operations, thus improving the efficiency of writing test scripts.
Add Property Checkpoints: For this test case, we will add a property checkpoint to verify the text in the Label control next to the
QInputDialog::getText()button. In the "Property Checkpoints" list, select the "text" property (whose value should be "This is some test text"), which is the target property we want to verify.Confirm and Insert Checkpoint Script: After selecting the property to verify, click the Confirm button. The corresponding checkpoint script will be inserted into our recording script.
If you need to add an image checkpoint, simply switch to the image checkpoint tab and check the images to be checked. This type of checkpoint is used to verify the appearance of specific images on the application interface, which is ideal for testing scenarios focused on visual elements.

Then you can continue to interact with the application under test. Since the recording has started, all operations will be synchronized to generate automation scripts, which can be seen in the editor. Once all operations are completed, click the 'Stop' button on the toolbar to finish recording an automation script. The content of the generated script is as follows:
import os
from leanproAuto import RunSettings, QtAuto

RunSettings.set({"slowMo": 1000, "reportSteps": True})

modelQt = QtAuto.loadModel(os.path.dirname(os.path.realpath(__file__)) + "/recording.tmodel")


# Start Qt Application "standarddialogs"
QtAuto.launchQtProcessAsync("C:/Program Files/LeanPro/CukeTest/bin/standarddialogs.exe")
modelQt.getApplication("standarddialogs").exists(10)

# Click "QInputDialog::getMultiLineText"
modelQt.getButton("QInputDialog::getMultiLineText").click()

# Set control value to "这是一些测试文本"
modelQt.getEdit("Edit").set("这是一些测试文本")

# Click "OK"
modelQt.getButton("OK").click()

# Check Properties
modelQt.getLabel("这是一些测试文本").checkProperty("text", "这是一些测试文本")

# Close Qt Application "standarddialogs"
modelQt.getApplication("standarddialogs").quit()
3. Running the Recorded Script
Click on the toolbar option "Show Script Column Only" to switch the CukeTest view to display only the script column, then click on "Run Script":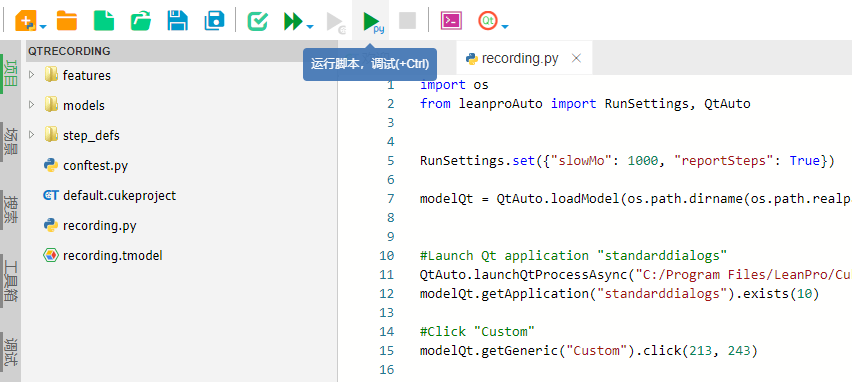
You can see that the playback completed smoothly. However, the playback speed is not very fast. This is because the recording feature of CukeTest defaults to "slow motion," which adds a slowMo option set to 1000 in the generated script, delaying each operation by 1 second. Here, we can set it to 0 to make the automation run at the fastest speed.
The generated script includes setting the value of
slowMo:RunSettings = auto.runSettings // …… RunSettings.set({"slowMo": 1000, "reportSteps": True})
Integrating Automated Test Cases with Code
The above actions merely recorded the automated operations, essentially allowing playback of the procedural steps. However, this cannot be considered testing yet because a testing script requires assertion parts in addition to testing operations, i.e., verifying the results of the test operations.
Next, we'll integrate the recorded script with automated testing.
1. Creating Application Models
The code generated from recording requires the model files used during recording to run. Therefore, before integrating the code, we need to create the necessary model files for this test. You can directly use the model generated from recording by copying it to the models directory and renaming it to model1.tmodel.
If your project already has model files, you can open both the existing model file and the newly recorded model file. Then, by dragging the root node of the newly recorded model into the existing model tree, you can copy the model. Next, right-click on the copied node and select "Merge to Sibling Node" to complete the model merge. This allows you to use the controls operated during the new recording in the existing model.
Additionally, you can choose "Record to Existing Model" during recording, which directly saves the new control objects to the existing model, further simplifying the integration process.
2. Writing Test Case Scenarios
Open the .feature file in the directory and write the business scenarios corresponding to the recent tests in natural language. This step is crucial to make the tests more readable and easier to manage: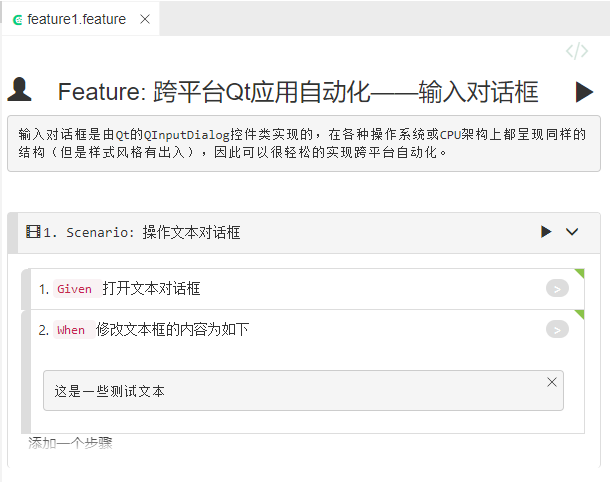
Next, switch the script editing mode to Text mode, copy the following content, and then switch back to Visual mode:
The text in step 2 is added by right-clicking on the step and selecting Add Text String, for more details refer to Step Editing.
Feature: 跨平台Qt应用自动化——输入对话框
输入对话框是由Qt的QInputDialog控件类实现的,在各种操作系统或CPU架构上都呈现同样的结构。
因此可以很轻松的实现跨平台自动化。

  Scenario: 操作文本对话框
    Given 打开文本对话框
    When 修改文本框的内容为如下
      """
      这是一些测试文本
      """
3. Modifying conftest.py
conftest.py is a configuration file specifically for storing fixtures, which pytest automatically recognizes and loads. In CukeTest, we place operations such as starting and closing the application under test, initializing the testing environment, etc., in this file.
Open the conftest.py file in the root directory and modify the application startup path app_path and model file path. After modification, the content of conftest.py will be as follows:
# conftest.py
from leanproAuto import QtAuto, Util

app_path = "C:/Program Files/LeanPro/CukeTest/bin/standarddialogs.exe"
model = QtAuto.loadModel("./models/model1.tmodel")
context = {}

# Equivalent to BeforeAll Hook, called before the first test starts
def pytest_sessionstart(session):
    context["pid"] = QtAuto.launchQtProcessAsync(app_path)


# Equivalent to AfterAll Hook, called after all tests have finished
def pytest_sessionfinish(session):
    Util.stopProcess(context["pid"])
This code accomplishes the following tasks:
- Application Path: Defines the path of the Qt application under test.
- Model Loading: Loads the model file mentioned earlier, which is crucial for UI automation testing.
- Test Session Start and End: Defines operations to be executed before the start and after the completion of all tests. This includes starting and stopping the application under test, ensuring proper initialization and cleanup of the testing environment.
With these configurations, our testing environment is fully prepared to execute the automated testing scripts.
4. Writing Step Definitions
Open the test_feature1.py file under the step_defs directory and write the step definitions.
Copy the recorded code into the test_feature1.py file according to the sequence of operations, and make the necessary modifications.
After modification, the content will look like this:
The assert statement at the end of step 2 is a built-in assertion library in Python, used to add checkpoints in the script.
# test_feature1.py
from pytest_bdd import scenarios, given, when, parsers
from leanproAuto import QtAuto
scenarios("../features")
model = QtAuto.loadModel('model1.tmodel')

@given("打开文本对话框")
def open_text_input():
    model.getButton("QInputDialog::getMultiLineText").click()


@when(parsers.parse("修改文本框的内容为如下\n{docString}"))
def edit_text_input(docString):
    print('content:', docString)
    model.getEdit("Edit").set("这是一些测试文本")
    model.getButton("OK").click()
    labelControl = model.getButton("QInputDialog::getMultiLineText").next("Label")
    textValue = labelControl.text()
    #检查属性
    labelControl.checkProperty("text", docString)
    assert textValue == docString, "没有成功修改文本框内容"
Execution
Click on "Run Project", and you will see the corresponding test report generated after the automation execution.

For more capabilities in Qt automation, refer to Cross-platform Qt Automation.